Most PCs ship with fan curves that assume worst-case cooling and ignore how quiet the system could actually run. A five-minute BIOS adjustment usually fixes it.
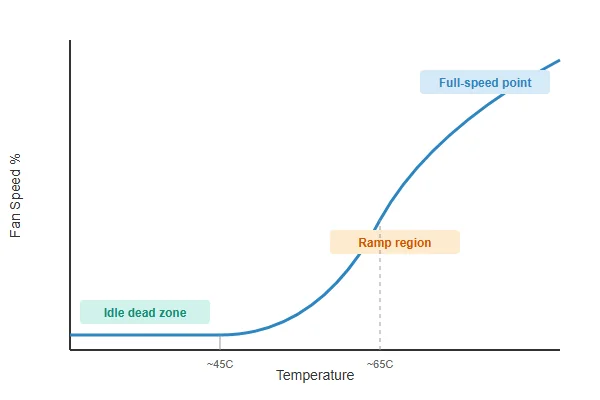
A fan curve is a set temperature-to-speed mapping that tells your case and CPU fans how fast to spin at a given temperature, and setting one up correctly in BIOS/UEFI lets the system run near-silent at idle while still ramping up fully under load, instead of running loud all the time by default.
- A fan curve maps temperature to fan speed in defined points, and most BIOS/UEFI implementations default to a conservative curve that spins fans faster than necessary at low temperatures.
- CPU temperature is the most common trigger source, but many boards also support motherboard and case-mounted temperature sensors for independent fan zones.
- Setting a wider dead zone near idle temperatures is usually the single biggest change for perceived noise, more impactful than lowering the maximum speed.
- Software fan control tools can offer more granular curves than BIOS, but they only run while the OS is loaded, leaving BIOS as the only control during boot and pre-OS states.
- A poorly configured curve with too narrow a temperature range causes audible "hunting" -- fans ramping up and down repeatedly -- which is usually more annoying than a fan running at a constant moderate speed.
Getting the curve shape right matters more than any single speed setting, and that shape is easier to configure than most BIOS menus make it look.
Table of Contents
What Is a Fan Curve, and Why Does the Default One Feel Louder Than Necessary?
Manufacturers set default curves conservatively because they can't predict your case airflow or ambient environment.
A fan curve is a series of temperature-and-speed points that a motherboard interpolates between, and default curves are set conservatively -- prioritizing thermal safety across every possible case and ambient condition over quiet operation in your specific build.
Why "Safe for Everyone" Means "Louder Than You Need"
A motherboard manufacturer has no way to know whether their board ends up in a well-ventilated open-frame build or a cramped mini-ITX case with poor airflow, so the factory-default curve is tuned to keep the worst-case scenario thermally safe. That means it typically starts ramping fan speed at a lower temperature than your specific case needs, and reaches higher speeds sooner than necessary for a build with decent airflow. The curve isn't wrong -- it's just calibrated for a hypothetical worst case, not your actual system.
| Curve Point | Typical Factory Default | Common User Adjustment |
|---|---|---|
| Idle temp (30-40°C) | 30-40% fan speed | 0-20% (near silent) |
| Moderate load (50-60°C) | 50-60% fan speed | 35-50% |
| High load (70°C+) | 80-100% fan speed | 80-100% (usually left as-is) |
How Do You Actually Access Fan Control in BIOS/UEFI?
The menu location and terminology vary significantly across motherboard brands, which is the main source of confusion.
Fan control lives under different menu names depending on brand -- commonly "Q-Fan Control" (ASUS), "Smart Fan" (MSI/Gigabyte), or "Fan Xpert" as a dedicated utility -- but is almost always reachable from an Advanced or Hardware Monitor tab after entering BIOS/UEFI setup during boot.
Finding the Right Tab Without Guessing
Entering BIOS/UEFI typically means pressing Del or F2 repeatedly during the earliest moment of boot, before the OS starts loading. Once inside, most modern UEFI interfaces have a graphical mode with a dashboard showing live temperatures and fan speeds -- this is usually where fan curve editing lives, sometimes as clickable points on a graph rather than a numeric table. If the graphical view isn't available or the board only has a text-based BIOS, look under "Advanced," "Monitor," or "Hardware Monitor" sections specifically, since fan settings are rarely on the main summary screen.
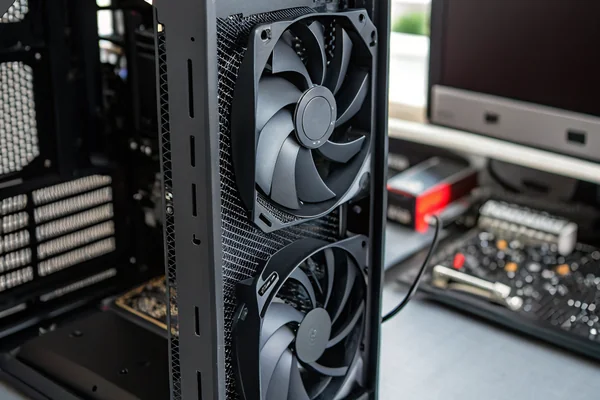
Each fan header is usually configured independently, meaning the CPU fan header and each case fan header can have different curves -- worth checking, since a board defaulting all headers to the same aggressive CPU-driven curve is a common source of unnecessary case fan noise.

Which Temperature Sensor Should Actually Drive Your Case Fans?
Choosing the wrong sensor source is one of the more common reasons a fan curve doesn't behave the way a user expects.
CPU temperature is the default trigger for most fan headers, but tying case fans to CPU temperature specifically can cause them to ramp before the case itself is actually warm -- motherboard or dedicated case temperature sensors, where available, often produce smoother and quieter case fan behavior.
Why CPU-Driven Case Fans Often Feel Overly Reactive
CPU temperature can spike quickly under short bursts of load -- opening a demanding application, a background compile task -- even when overall case temperature hasn't meaningfully changed yet. If case fans are tied directly to CPU temperature, they respond to every one of those spikes, which can produce audible speed changes that don't correspond to any real cooling need. Motherboard temperature, measured at the board itself, tends to rise and fall more gradually and better reflects actual case thermal conditions for fans whose job is general case airflow rather than direct CPU cooling.
Some boards support auxiliary temperature headers for physical sensors placed near GPU exhaust or in a specific case zone, which gives the most accurate case-specific control if the board and case support it.
How Do You Set an Optimal Curve for Silence Without Sacrificing Real Cooling?
The goal isn't the lowest possible speed at every point -- it's the widest comfortable dead zone paired with a curve that still reaches full speed when it matters.
Set a wide near-zero speed zone from ambient up to roughly 45-50°C, a moderate ramp through the 50-70°C range, and let the curve reach 100% by your CPU's throttle point (often 85-95°C depending on the chip) -- this keeps idle and light-load noise minimal while preserving full cooling headroom for genuine sustained load.
Building the Curve Point by Point
Start by identifying your idle and typical light-load temperatures (usually visible on the same BIOS dashboard), and set the lowest curve point's speed near zero or the fan's minimum stable RPM across that range -- most modern PWM fans can run reliably down to 20-30% duty cycle. From there, add a moderate second point somewhere in the 55-65°C range at 40-50% speed, giving the system headroom before it needs to get loud. The final point should reach 100% at or just below the CPU's actual thermal throttle temperature, not an arbitrary round number -- check your specific CPU's rated maximum, since this varies meaningfully between chip generations and cooler configurations.
Avoid placing curve points too close together in temperature; a gap of less than 5-10°C between points is a common cause of fans hunting between two speeds as temperature oscillates slightly around the transition point.
Are Software Fan Control Tools a Better Option Than BIOS?
Software tools offer real advantages, but they come with a tradeoff BIOS-only control doesn't have.
Software fan control utilities -- motherboard vendor apps or third-party tools -- generally offer more granular curves and easier real-time adjustment than BIOS, but they only function once the operating system has loaded, leaving BIOS-level settings as the only fan control active during boot, POST, and any pre-OS state.
The Case for Configuring Both Layers
Because software tools stop functioning the moment the OS isn't running -- during boot, in BIOS itself, or if the OS crashes -- a reasonable BIOS-level curve should still exist as a safety baseline even if day-to-day control happens through software. Third-party tools often expose more curve points and independent multi-fan zones than a given BIOS supports, and some allow hysteresis tuning (how much temperature has to drop before the fan speed decreases again) that BIOS interfaces rarely expose directly. The practical approach for most builds is a conservative-but-reasonable BIOS curve as the fallback, refined further with software once the OS is running if finer control is wanted.
What Should You Check Before Trusting a New Fan Curve Long-Term?
A curve that looks correct in the BIOS graph can still behave differently once the system is under real, sustained use.
Before trusting a new fan curve, stress test the system under sustained full load for at least 15-20 minutes while monitoring temperatures, confirm the curve reaches 100% before any thermal throttling occurs, and listen for hunting behavior during normal daily use over the following few days.
Why a Quick BIOS-Screen Check Isn't Enough
The BIOS dashboard shows instantaneous temperature and fan speed, which doesn't reveal how the system behaves under sustained load over 20-30 minutes -- exactly the condition where an undersized curve reveals itself through slowly climbing temperatures the fan curve isn't responding to aggressively enough. Running a stress test tool after leaving BIOS and monitoring temperatures in real time is the only reliable way to confirm the curve's high-temperature end is actually adequate, not just theoretically correct on paper.
Does Fan Curve Configuration Interact With Fan Quality and Bearing Type?
The best-tuned curve still can't fully compensate for a fan that behaves poorly at low speed.
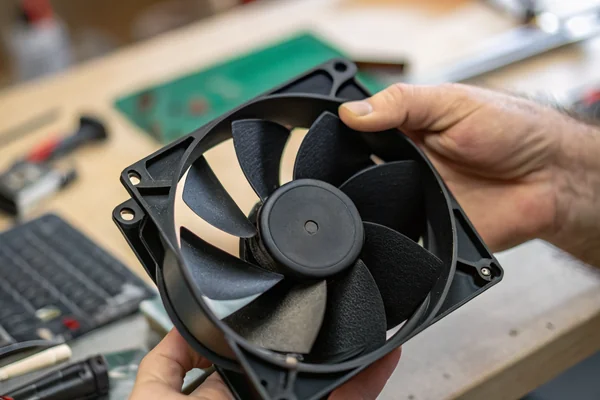
A fan curve's low-speed performance is only as good as the fan itself -- fans with poor low-RPM stability or higher static friction can stall, stutter, or produce audible motor noise at the low end of a curve, which is a fan hardware limitation a BIOS setting can't fully correct.
Why Some Fans Handle Low Duty Cycles Better Than Others
PWM fans vary in their minimum stable operating speed -- some run smoothly down to 15-20% duty cycle, while others become unstable or produce an audible whine below 30-40%. A fan curve set for near-silent idle assumes the fan can actually sustain low RPM cleanly; if it can't, the practical fix is either raising the curve's minimum speed floor above the fan's stable threshold, or replacing the fan with one rated for better low-speed stability. This is one of the few points in fan curve tuning where the limiting factor is genuinely the hardware rather than the software configuration.
Our PC case cooling fan line is built around stable low-duty-cycle PWM behavior specifically because customers pair our fans with custom BIOS and software fan curves -- every fan we ship is validated on our in-house dynamic balance correction equipment to confirm it runs cleanly down to low RPM without motor stutter, and our Dongguan facility has produced PWM-controllable DC fans for over 20 years under ISO 9001 certification.
FAQ
Why does my fan speed keep jumping up and down instead of ramping smoothly?
This is usually curve points spaced too closely together in temperature, causing normal thermal fluctuation to repeatedly cross a threshold. Spacing points at least 5-10°C apart typically resolves it.
Is it safe to set the minimum fan speed to 0% at idle?
Only if your motherboard and fan support true zero-RPM idle mode, and even then it's worth confirming case temperatures stay reasonable during extended idle periods before relying on it long-term.
Do case fans need their own curve, or can they just follow the CPU fan curve?
They can follow it, but case fans tied directly to CPU temperature often ramp more reactively than necessary. A motherboard-temperature-based curve usually produces smoother case fan behavior if your board supports it.
Will an aggressive fan curve shorten my fan's lifespan?
Constant speed cycling adds more mechanical wear over time than running at a stable moderate speed, so a smoother curve with wider point spacing is generally better for long-term fan life, not just noise.
Can I use different curves for gaming versus everyday use?
Yes, if your motherboard software supports saved profiles. Many vendor utilities let you switch between a quiet profile and a performance profile without re-entering BIOS each time.
What happens to fan speed if my BIOS fan curve setting gets reset?
Most boards revert to their factory default curve after a BIOS reset or update, which is typically louder than a manually tuned curve -- worth checking and re-applying your settings after any BIOS firmware update.
A well-tuned fan curve is one of the few PC changes that costs nothing and meaningfully improves daily experience, provided the curve is shaped correctly rather than just turned down. At Herays, our Dongguan facility has manufactured PWM-controllable DC cooling fans for over 20 years under ISO 9001 and IATF 16949 certification, built to run cleanly across the full range a well-tuned curve asks of them. If you're specifying fans for a custom or OEM build with specific acoustic targets, we're glad to talk through low-speed performance and PWM behavior directly.

Liang
I've been working with DC fans for 30 years — long enough to have seen the industry evolve from basic sleeve bearing designs to today's high-efficiency, IP68-rated systems built for the harshest environments imaginable. I founded Herays because I believed manufacturers and engineers deserved a supplier who could talk technical from day one. Not just hand over a datasheet, but actually help you select the right fan for your thermal load, your enclosure, your certification requirements. Most of what I write here comes directly from problems I've solved on the factory floor or in customer applications — medical devices, laser equipment, industrial automation, you name it. If it involves moving air efficiently and reliably, I've probably spent time thinking about it. When I'm not obsessing over airflow curves, I'm usually helping a customer figure out why their cooling system isn't performing the way their simulation said it would.
View all posts by Liang