A fan swap looks trivial until the replacement doesn't fit the mounting holes, the connector doesn't match, or the airflow direction ends up backwards -- all avoidable with a bit of upfront checking.
Replacing a PC case fan means confirming the correct size and mounting pattern, matching connector type, checking airflow direction markings before installation, and reconnecting cables properly -- a straightforward process that goes wrong most often from skipping the verification steps rather than the physical installation itself.
- Confirming exact fan size and mounting hole spacing before buying a replacement prevents the most common fan-swap frustration -- a fan that doesn't physically fit.
- Airflow direction is usually marked with small arrows on the fan frame, and installing a fan backwards is an easy, avoidable mistake that undermines your case's airflow design.
- Connector type (3-pin, 4-pin PWM) should match or be intentionally chosen to match your motherboard header's capability, not assumed to be interchangeable.
- Anti-vibration mounting (rubber grommets or washers) matters for noise even on a straightforward replacement, not just on the original installation.
- Testing the new fan's operation and monitoring temperatures after replacement confirms the swap actually achieved its intended result, rather than assuming success from installation alone.
Working through each step deliberately, rather than rushing the physical swap, is what separates a clean replacement from one that introduces a new problem.
Table of Contents
When Does a Case Fan Actually Need to Be Replaced?
Recognizing genuine replacement triggers, rather than replacing prematurely or too late, sets up the rest of the process correctly.
A case fan typically needs replacement when it develops audible bearing noise or wobble, fails to spin reliably, shows visibly degraded blades or a cracked frame, or when upgrading to better performance or aesthetics -- distinguishing a genuine failure from a fixable issue (like dust buildup) first avoids an unnecessary replacement.
Why It's Worth Ruling Out Simple Fixes First
Before assuming a fan needs replacement, a thorough cleaning to remove dust buildup and a check of the connector for a loose or partially seated connection can resolve issues that look like fan failure but aren't. Genuine bearing wear typically produces a consistent grinding or clicking noise that persists after cleaning, while connector or dust issues often resolve with basic maintenance -- worth ruling out before committing to a replacement purchase.
What Tools Do You Actually Need for a Straightforward Fan Swap?
The tool list for this job is generally short, which is part of why it's a reasonable DIY task for most builders.
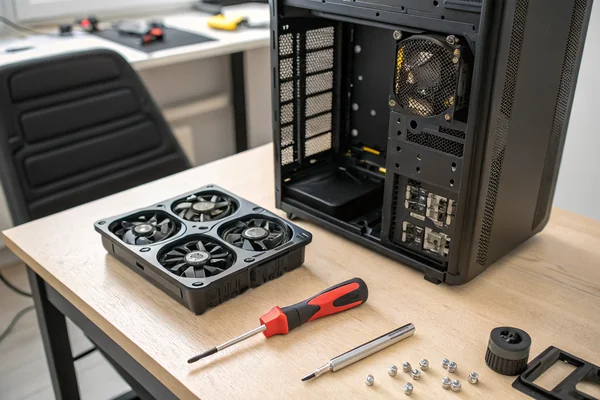
A basic case fan replacement typically requires only a Phillips screwdriver matched to your case's fan mounting screws, though having anti-static precautions (touching a grounded metal surface, or an anti-static wrist strap) and a small parts tray to keep screws organized are worth having on hand for a clean, safe process.
Why Anti-Static Precautions Still Matter for a "Simple" Task
Even though a fan swap doesn't involve directly handling sensitive silicon components, working inside an open case with power connected to other components still carries some static discharge risk, and developing the habit of anti-static precautions for any inside-the-case work is generally good practice regardless of the specific task's apparent risk level. Keeping removed screws organized in a small tray also prevents the common frustration of losing small mounting hardware mid-project.
How Do You Safely Remove the Old Fan?
Removal itself is usually simple, but a few details are worth getting right before pulling the fan out.
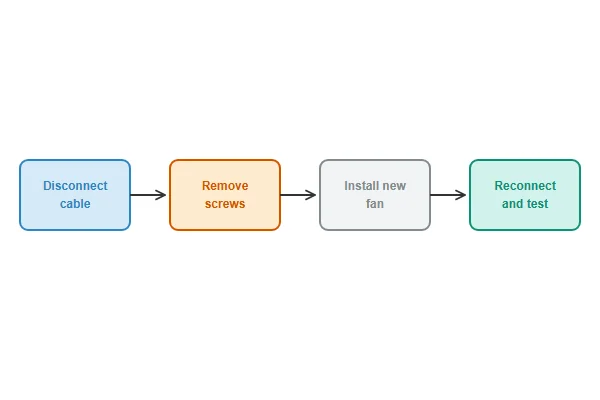
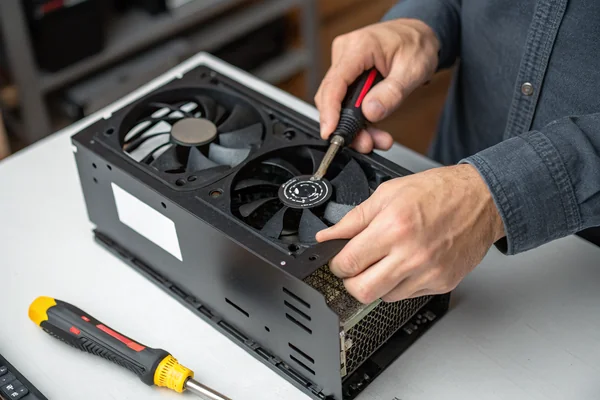
Power down and unplug the system completely, disconnect the fan's cable from its motherboard header before removing mounting screws, remove the four corner screws (noting their type, since some cases use different screws for different fan positions), and gently pull the fan free without forcing it if a cable is still routed through a tie-down point.
Why Disconnecting the Cable First Prevents Avoidable Damage
Removing mounting screws before disconnecting the fan's cable risks the fan swinging or falling while still attached by its wire, potentially stressing the connector or cable. Disconnecting the cable first, then removing the screws, keeps the fan fully free to handle once physically detached. Taking a quick photo of the cable routing before removal can also help ensure the replacement fan's cable gets routed the same clean way, rather than leaving it loose inside the case.
How Do You Install the New Fan Correctly?
Installation is where airflow direction and orientation details matter most, since they're easy to get backwards without checking.
Check the small airflow direction arrows printed on the fan frame to confirm correct orientation for your intended intake or exhaust position, align the fan with the case's mounting holes, install anti-vibration rubber grommets or washers if your case uses them, and secure with the four corner screws -- snug but not overtightened, since overtightening can crack the plastic frame.
Why Airflow Direction Arrows Are Easy to Miss but Important to Check
Nearly every case fan has small embossed or printed arrows on its frame edge indicating both blade rotation direction and airflow direction, but they're easy to overlook if you're focused on the mounting holes and screws. Installing a fan backwards relative to your intended airflow design undermines the pressure balance and airflow pattern you're trying to achieve, even though the fan will still spin and appear to be working normally -- it's a mistake that isn't obvious without specifically checking the direction markings.
What Should You Check When Reconnecting Cables?
Cable reconnection seems trivial but is where connector mismatches most often surface.
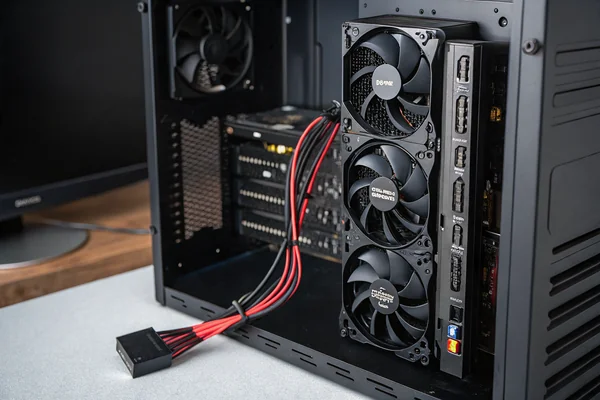
Confirm the replacement fan's connector type (3-pin or 4-pin PWM) matches or is intentionally paired with your motherboard header, seat the connector fully until it clicks or sits flush, and route the cable cleanly away from any fan blades or moving components before closing the case.
Why Connector Confirmation Matters Even on a "Like-for-Like" Swap
If your replacement fan has a different connector type than the original -- a 4-pin PWM replacement for an older 3-pin fan, for instance -- confirming your motherboard header supports the connector type, or understanding what functionality you'll gain or lose, avoids a surprise after reassembly. A connector that isn't fully seated is also a common, easily overlooked cause of a "new fan doesn't work" problem that has nothing to do with the fan itself.
How Do You Actually Confirm the Replacement Was Successful?
Closing the case and assuming success isn't the same as confirming the swap actually achieved its intended result.
After reassembly, power on the system and confirm the new fan spins smoothly without unusual noise, check that it's detected correctly in BIOS or monitoring software (RPM reading present), and monitor system temperatures under representative load over the following days to confirm the replacement is performing as expected.
Why a Quick Post-Install Check Isn't Quite Enough
A fan that spins normally at power-on can still have a connector not fully seated for tachometer signal reporting, or may be installed in the wrong airflow orientation despite spinning fine -- both issues that a longer-term temperature check after the swap will reveal even if the immediate post-install check looked fine. Comparing temperatures under a representative workload against your system's typical behavior before the swap gives more confidence the replacement is functioning as intended, not just spinning.
Our PC case cooling fan line ships with clear airflow direction markings and standard mounting hole patterns compatible with common case designs, backed by anti-vibration corner grommets as standard on many models. Every fan is validated on our in-house testing equipment at our Dongguan facility before shipment, and our over 20 years of production experience under ISO 9001 certification means replacement fans perform consistently with what the original installation expected.
FAQ
Can I replace just one fan in a matched multi-fan set, or should I replace them all together?
Replacing just one is generally fine functionally, though if aesthetics (matching RGB lighting or fan blade design) matter to you, consider whether a single different-looking fan will bother you visually in an otherwise matched set.
Is it safe to run the system briefly with the case open to test the new fan before closing it up?
Yes, this is a common and reasonable way to visually confirm correct spinning and rotation direction before final reassembly, just be mindful of dust and avoid touching internal components while powered on.
Do I need to update any BIOS fan curve settings after a fan replacement?
Not necessarily, but if the replacement fan has different speed characteristics than the original (different RPM range), revisiting your fan curve settings can help ensure the new fan is being used within its own optimal speed range.
What should I do if the new fan doesn't spin at all after installation?
First check the cable connection is fully seated, then confirm the motherboard header is actually providing power (test with a different known-working fan if possible) before assuming the new fan itself is defective.
Does fan replacement affect my system's warranty?
Generally no for the system itself, since fan replacement is standard user-serviceable maintenance, though check your specific system or case warranty terms if you have concerns about opening the case.
How long should a properly installed replacement fan typically last?
This depends on the specific fan's bearing type and your operating conditions, but a properly installed replacement should perform in line with its rated lifespan specifications, assuming correct installation and normal operating conditions.
A case fan replacement is a straightforward task once you work through size, connector, orientation, and reconnection deliberately rather than rushing the physical swap. At Herays, our Dongguan facility manufactures PC case cooling fans with standard mounting compatibility and clear airflow markings, validated for consistent performance under ISO 9001 certification. If you're sourcing replacement fans for a fleet of systems or a custom build, we're glad to help match specifications to your existing setup.

Liang
I've been working with DC fans for 30 years — long enough to have seen the industry evolve from basic sleeve bearing designs to today's high-efficiency, IP68-rated systems built for the harshest environments imaginable. I founded Herays because I believed manufacturers and engineers deserved a supplier who could talk technical from day one. Not just hand over a datasheet, but actually help you select the right fan for your thermal load, your enclosure, your certification requirements. Most of what I write here comes directly from problems I've solved on the factory floor or in customer applications — medical devices, laser equipment, industrial automation, you name it. If it involves moving air efficiently and reliably, I've probably spent time thinking about it. When I'm not obsessing over airflow curves, I'm usually helping a customer figure out why their cooling system isn't performing the way their simulation said it would.
View all posts by Liang